
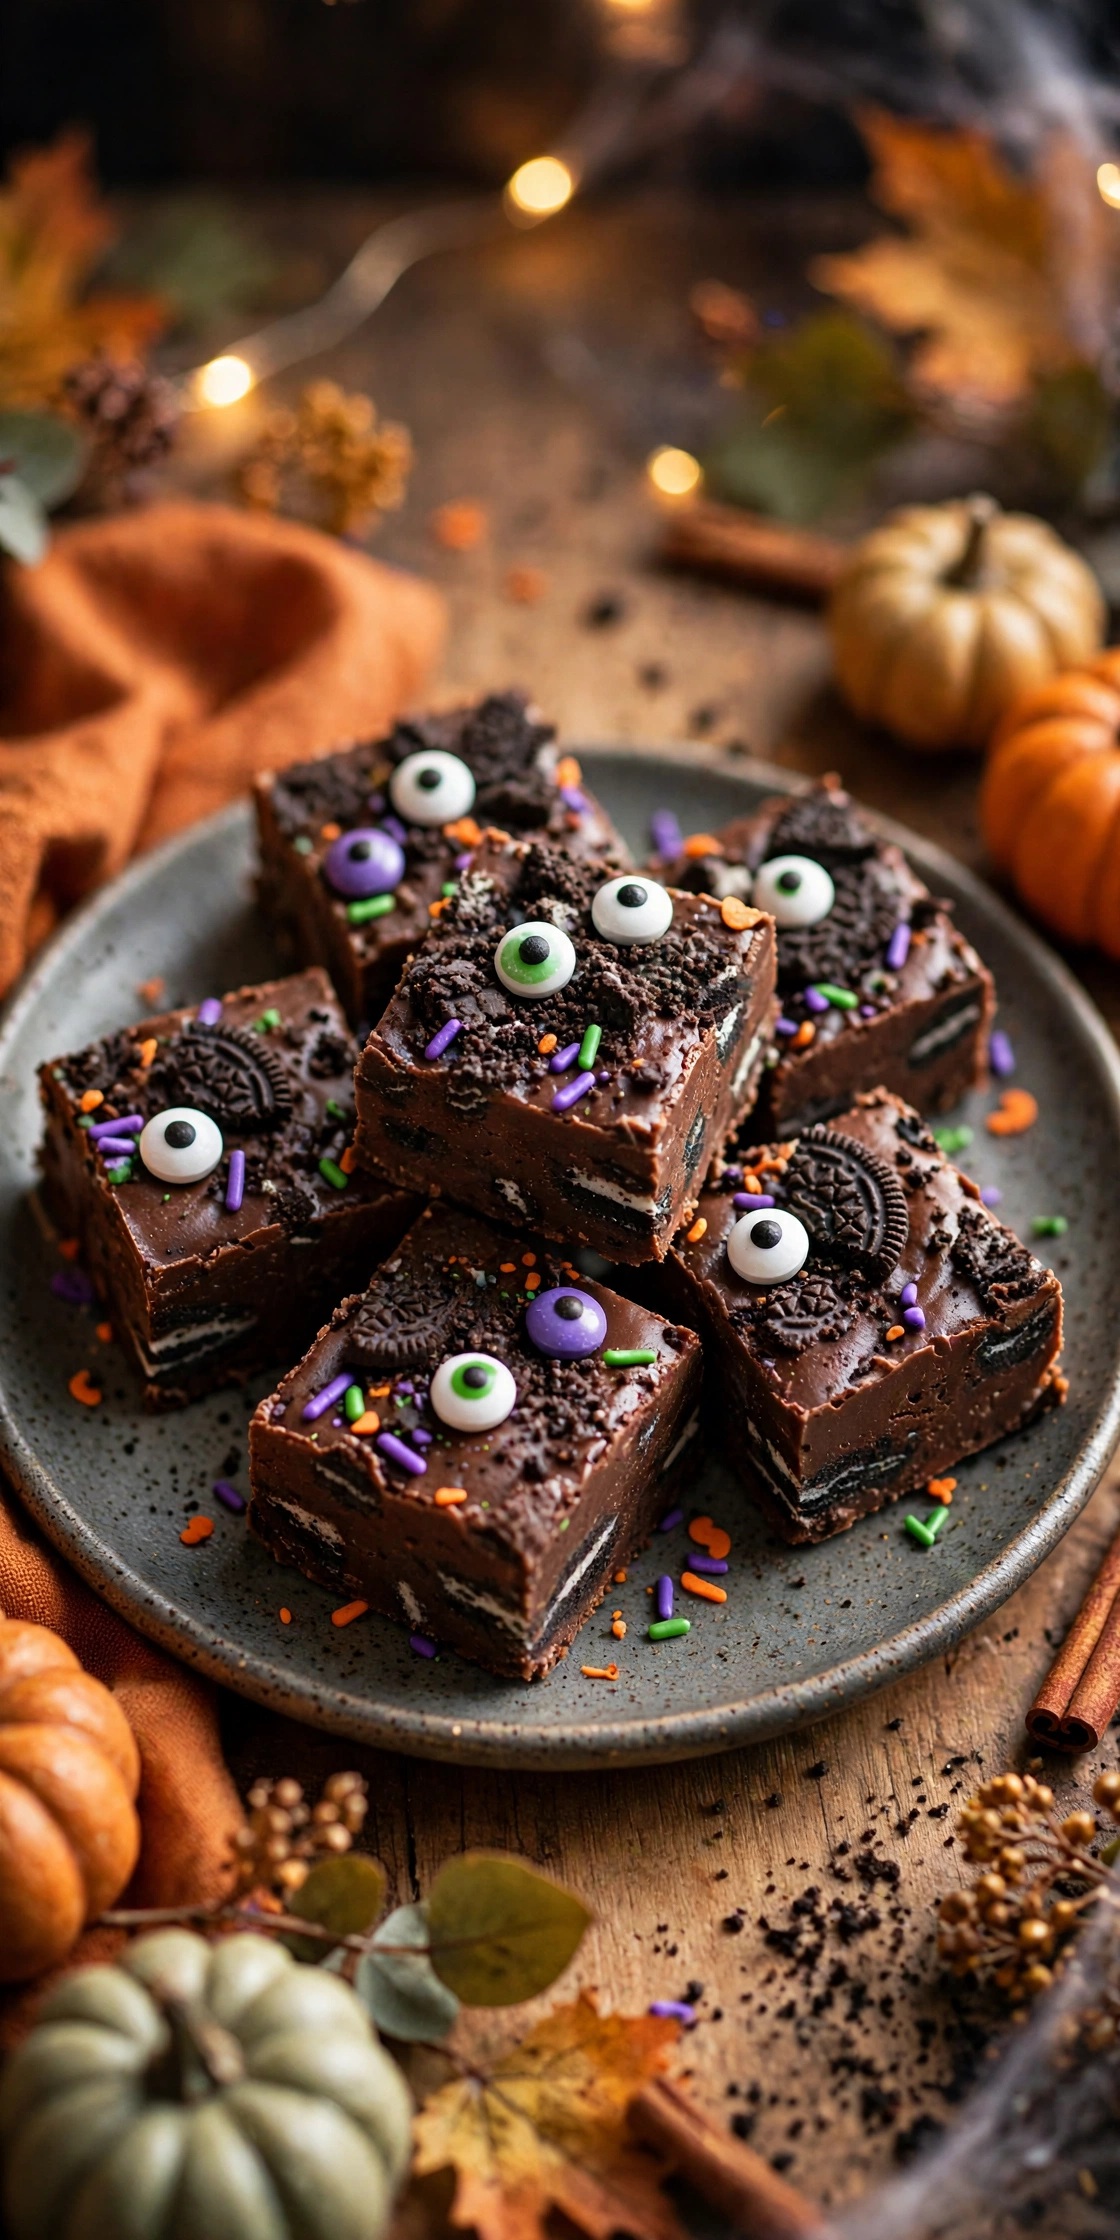
Monster Mash Oreo Fudge is the kind of Halloween treat that looks like a party before anyone takes a bite. It is bright, a little silly, and unmistakably festive, with swirls of purple, green, and orange running through creamy white chocolate fudge, plus crushed Oreo cookies and candy eyes peeking out from every square. Kids love spotting the eyes, and adults love that no oven is involved.
This is a no-bake recipe in the truest sense. You melt, stir, swirl, and chill. There is no candy thermometer to watch and no boiling sugar to worry about. If you can stir a bowl and line a pan with parchment paper, you can make this fudge, which makes it a good choice for a school party or a last-minute Halloween dessert table.
The flavor is simple and crowd-friendly. White chocolate gives the fudge its sweet, creamy base, crushed Oreos add crunch and cookies-and-cream taste, and a little vanilla rounds it out. Each square is rich, so a small piece goes a long way on a full dessert table.
What Makes It a Monster Mash
The name comes from the mix, not from any one ingredient. Instead of a single flat color, you divide the fudge into three bowls and tint each one a different Halloween shade. Purple, lime green, and orange are the classic combination, and they look great swirled together in a pan. When you cut the chilled fudge, every square has a different pattern, so no two pieces look quite alike.
Candy eyes are the finishing touch that turns ordinary swirled fudge into monster fudge. Press them gently into the top while the fudge is still soft, with a few Halloween sprinkles if you like. Do not arrange the eyes in perfect pairs; the fudge looks better when they are a little random, with some clustered together and others peeking out from the sides.
If you are making this with children, let them handle the decorating: spooning the colors into the pan, dragging a knife through the swirls, and placing the candy eyes. The recipe is forgiving, so a messy swirl still sets into beautiful fudge. Keep the melting steps for an adult, since melted chocolate holds heat longer than it looks.
Recipe Card
Prep time: 20 minutes
Cook time: 0 minutes (no-bake)
Chill/set time: 2 hours
Total time: 2 hours 20 minutes
Servings: 16 squares
Pan: 8 x 8 inch square pan, lined with parchment paper with overhang on two sides
Ingredients
- 3 cups (about 510 g) white chocolate chips
- 1 can (14 ounces) sweetened condensed milk
- 2 tablespoons unsalted butter
- 1 teaspoon vanilla extract
- Pinch of salt
- 18 Oreo cookies, divided: 12 crushed into coarse crumbs and chunks, 6 roughly chopped for the top
- Purple, green, and orange gel food coloring
- 2 tablespoons Halloween sprinkles
- 1 packet (about 40 to 50) candy eyes
Instructions
- Line an 8 x 8 inch pan with parchment paper, leaving overhang on two sides so you can lift the fudge out later. Lightly grease the parchment if your pan tends to stick.
- Place the white chocolate chips, sweetened condensed milk, and butter in a large microwave-safe bowl. Microwave in 30-second bursts, stirring well after each burst, until the mixture is smooth and fully melted. This usually takes 90 seconds to 2 minutes in total. Do not overheat it, or the chocolate can seize and turn grainy.
- Stir in the vanilla extract and the pinch of salt. Fold in the 12 crushed Oreo cookies, keeping some larger chunks for texture rather than crushing everything to dust.
- Divide the mixture evenly among three small bowls. Tint one bowl purple, one green, and one orange, using gel food coloring a little at a time until the colors look bright. Gel coloring works better than liquid coloring here, because it adds strong color without thinning the fudge.
- Spoon dollops of each color randomly into the lined pan, alternating colors as you go. Once all the fudge is in the pan, drag a butter knife or skewer through it a few times in loose S-shaped motions to create swirls. Do not overmix, or the colors will muddy into brown.
- Scatter the 6 roughly chopped Oreos, the Halloween sprinkles, and the candy eyes over the top. Press them in very gently with the back of a spoon so they stick as the fudge sets.
- Cover the pan and refrigerate for at least 2 hours, until the fudge is completely firm to the touch. Lift it out using the parchment overhang, place it on a cutting board, and cut into 16 squares with a sharp knife. Wipe the knife clean between cuts for the neatest edges.
Tips for Bright Colors and Clean Cuts
Gel food coloring is worth using here. Liquid coloring can make the fudge softer and duller, while gel gives bold purple, green, and orange with just a few drops. Start with less than you think you need and add more after stirring well.
Temperature matters more than speed. Melt the chocolate gently and stir between each microwave burst. If the mixture looks grainy or seized, it usually got too hot too fast, so keep the bursts short on your next batch.
For clean squares, chill the fudge until fully firm, not just cool on top. A warm, sharp knife cuts best, so run the blade under hot water, dry it, and wipe it clean between cuts. A 4 x 4 grid gives 16 generous squares; a 5 x 5 grid gives 25 smaller bites for a party tray.
Variations to Try
For a peanut butter monster version, stir 1/3 cup of creamy peanut butter into the melted white chocolate mixture before dividing it into bowls, and swap in peanut butter sandwich cookies. It will be slightly softer, so give it an extra 30 minutes in the fridge.
For a mint version, add 1/2 teaspoon of peppermint extract along with the vanilla, use green and purple coloring only, and top with crushed mint sandwich cookies.
For a simpler classroom-friendly version, skip the three-color swirl and tint the whole batch purple or green. You still get the monster look from the candy eyes, and it becomes a one-bowl job.
Make-Ahead and Storage
This fudge is an excellent make-ahead treat. Make it up to five days before a party and keep it in an airtight container in the refrigerator, with parchment paper between layers so the candy eyes do not stick to the pieces above them. Take it out about 15 minutes before serving.
For longer storage, freeze the cut squares in a single layer on a baking sheet until firm, then transfer them to a freezer-safe container with parchment between layers. They keep well for up to one month; thaw in the refrigerator overnight before serving.
Do not leave the fudge out for hours at a warm party. White chocolate softens in heat, so keep the tray chilled until serving time and return leftovers to the fridge promptly.
Serving Ideas for a Halloween Party
Arrange the squares on a dark plate or black tray so the swirls stand out, and scatter a few extra candy eyes around the tray for the monster theme.
These squares also work well as party favors. Wrap individual pieces in small cellophane bags and tie them with orange or purple ribbon. Because the fudge is sturdy once chilled, it travels better than frosted cupcakes or cookies.
Frequently Asked Questions
Can I make Monster Mash Oreo Fudge without a microwave?
Yes. Melt the white chocolate chips, sweetened condensed milk, and butter in a heatproof bowl over barely simmering water, stirring often until smooth. Keep the heat low and do not let water splash into the bowl.
Do I have to use gel food coloring?
Gel coloring is strongly recommended for bright colors. Liquid coloring can work, but you will need more of it, and the extra liquid can soften the fudge, so add it sparingly and chill a little longer.
Can I use regular chocolate instead of white chocolate?
You can, but the colors will not show up the same way. Milk or dark chocolate makes a brown base, so the swirls will look muted. White chocolate is what keeps the Halloween colors bright.
How far ahead can I make this fudge?
You can make it up to five days ahead and store it in the refrigerator in an airtight container. For longer storage, freeze the cut squares for up to one month and thaw them in the refrigerator overnight before serving.
Why did my fudge turn out soft instead of firm?
The most common causes are under-chilling and too much liquid coloring. Chill for a full 2 hours until completely firm, use gel coloring, and measure the sweetened condensed milk accurately.
More Recipes You’ll Love
- Mummy Pigs in a Blanket for Halloween Parties
- Crispy Potato Cheese Bombs
- Easy Apple Crisp Recipe (The Best Fall Dessert)
- Easy Pumpkin Bread Recipe (Super Moist Every Time)
- 15 Easy Thanksgiving Desserts Everyone Will Love
Next Recipe: Classic Red Velvet Cake