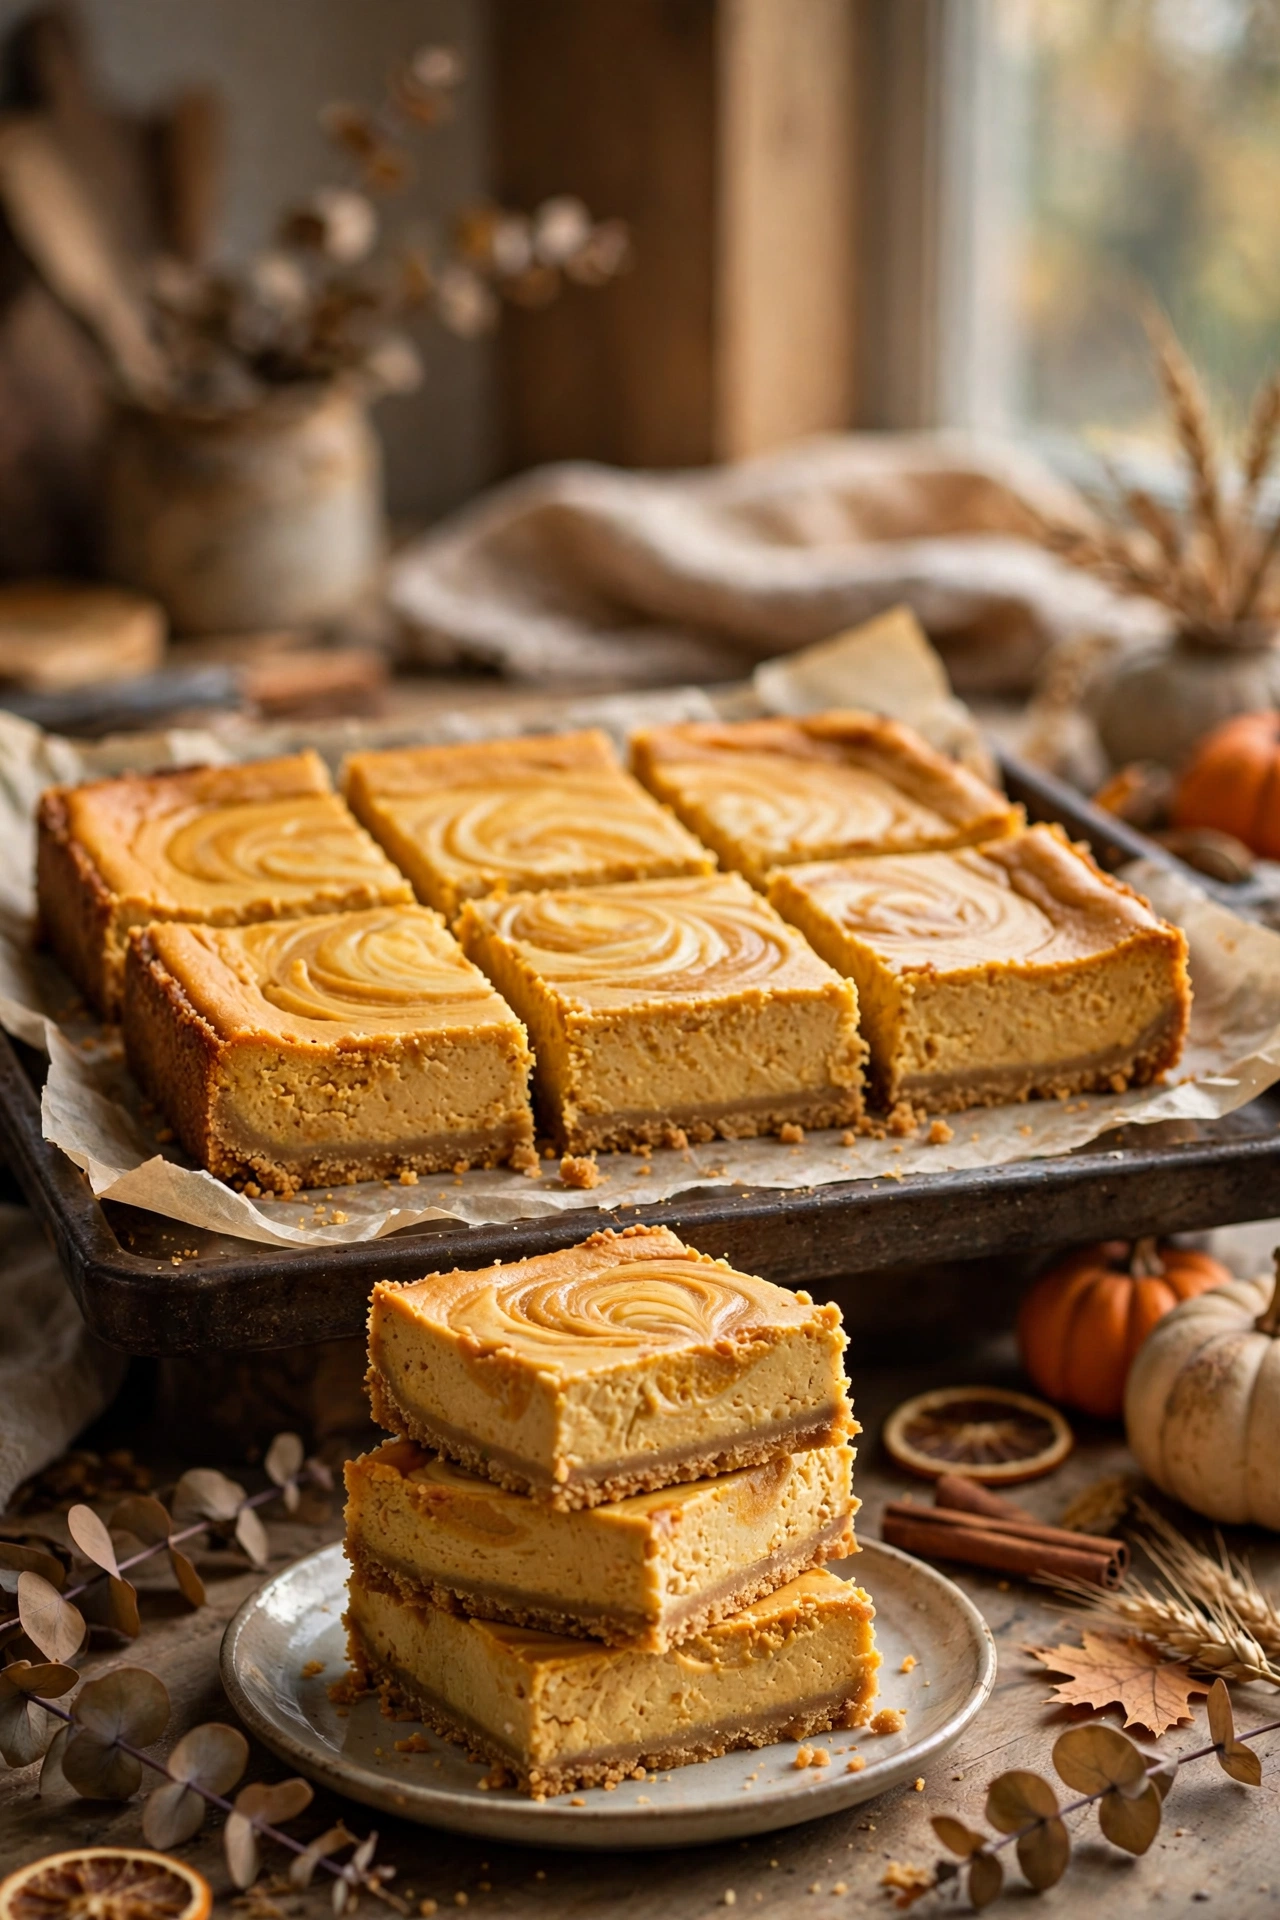
There is a certain kind of fall baking that feels calm rather than fussy. You stir a spiced pumpkin filling, press a buttery crust into a pan, and let the oven do the rest. These pumpkin cheesecake bars are exactly that kind of recipe: rich enough for a holiday table, simple enough for a Tuesday night, and sturdy enough to carry to a gathering without falling apart.
Unlike a whole cheesecake, bars bake faster, cool faster, and slice into neat portions. The graham crust stays crisp, the center sets creamy, and each square looks finished without extra decorating. If you have made pumpkin pie before, you will recognize the warm spice. If you have never baked cheesecake, this is a forgiving place to start.
Why You Will Love These Bars
First, they taste like fall in the best sense: real pumpkin, cinnamon, ginger, and a little nutmeg, balanced by tangy cream cheese rather than hidden under sweetness. Second, the texture works. The crust is firm, the filling is smooth, and the bars hold their shape when cut cold. Third, they are practical. You can bake them a day ahead, chill them overnight, and slice them just before serving, which makes them a strong choice for Thanksgiving, a potluck, or a weekend dessert table.
They also travel well. Lifted out in one slab, they pack in a single layer in a covered container and stay chilled until you arrive. No springform pan, no water bath, and no last-minute assembly.
Ingredients
For the Graham Crust
- 1 1/2 cups graham cracker crumbs (about 10 full sheets, finely crushed)
- 1/4 cup granulated sugar
- 1/2 teaspoon ground cinnamon
- 6 tablespoons unsalted butter, melted
- 1 pinch fine salt
For the Pumpkin Cheesecake Filling
- 16 ounces full-fat cream cheese, softened to room temperature
- 3/4 cup granulated sugar
- 1 cup pumpkin puree (not pumpkin pie filling)
- 2 large eggs, at room temperature
- 1/3 cup sour cream
- 1 teaspoon vanilla extract
- 1 1/2 teaspoons ground cinnamon
- 1/2 teaspoon ground ginger
- 1/4 teaspoon ground nutmeg
- 1/8 teaspoon ground cloves
- 1/4 teaspoon fine salt
- 2 tablespoons all-purpose flour
Optional Topping
- Lightly sweetened whipped cream, for serving
- A dusting of cinnamon, for serving
Use plain canned pumpkin puree, not pumpkin pie filling, which already contains sugar and spice and will throw off the balance. Full-fat cream cheese gives the filling its structure, so light cream cheese is not a good swap. Set the cream cheese and eggs out about 30 minutes before you begin so they blend smoothly.
How to Make Pumpkin Cheesecake Bars
Step 1: Prepare the Pan
Heat the oven to 325°F (165°C). Line a 9-inch square baking pan with parchment paper, leaving an overhang on two sides so you can lift the bars out later. Lightly grease the exposed sides of the pan.
Step 2: Make the Crust
Stir the graham cracker crumbs, sugar, cinnamon, salt, and melted butter in a medium bowl until the mixture looks like damp sand. Press it firmly and evenly into the bottom of the prepared pan, using the bottom of a measuring cup to compact it. Bake for 10 minutes, until fragrant and just set. Set aside while you make the filling, and leave the oven on.
Step 3: Beat the Cream Cheese and Sugar
In a large bowl, beat the softened cream cheese and sugar with an electric mixer on medium speed for about 2 minutes, until completely smooth. Scrape down the bowl and beater halfway through. This step is worth doing well: any lumps now will stay in the finished bars.
Step 4: Add the Pumpkin and Eggs
Beat in the pumpkin puree, sour cream, and vanilla until smooth. Add the eggs one at a time, mixing on low speed just until each one disappears. Add the cinnamon, ginger, nutmeg, cloves, salt, and flour, and mix on low until just combined. Do not overbeat once the eggs are in, since too much air can cause the top to crack or puff unevenly.
Step 5: Fill and Smooth
Pour the filling over the warm crust and spread it into an even layer with an offset spatula or the back of a spoon. Tap the pan gently on the counter two or three times to release any large air bubbles.
Step 6: Bake
Bake for 38 to 45 minutes, until the edges are set and the center still has a slight jiggle when you gently shake the pan. The center will continue to set as it cools. A toothpick test is not reliable here; a clean toothpick usually means the bars are overbaked and dry.
Step 7: Cool, Then Chill
Cool the pan on a wire rack for 1 hour, then cover and refrigerate for at least 4 hours, or overnight for the cleanest slices. Do not rush this step. Warm cheesecake bars will not cut neatly, no matter how sharp the knife is.
Step 8: Slice and Serve
Use the parchment overhang to lift the chilled slab onto a cutting board. Use a long, sharp knife, wiping it clean with a hot, damp cloth between cuts. Cut into 16 squares. Serve chilled or at cool room temperature, with whipped cream and a dusting of cinnamon if you like.
Tips for Clean Slices and a Smooth Top
Chill time is the single biggest factor in neat bars. Overnight chilling firms the filling fully and makes the crust hold together. A hot knife helps too: dip the blade in hot water, wipe it dry, cut once, and repeat. Wiping between cuts keeps crumbs from dragging across the next square.
Keep the oven temperature steady and resist opening the door too often. A small jiggle in the center is normal; the bars will look slightly underdone in the middle when they come out, and that is exactly right. Overbaking is the most common reason pumpkin cheesecake turns dry or cracked. If the top does crack a little, a spoonful of whipped cream covers it, and the flavor is unchanged.
Variations to Try
For a gingersnap crust, replace the graham crumbs with an equal amount of finely crushed gingersnap cookies and reduce the added cinnamon to 1/4 teaspoon. The result is spicier and pairs well with pumpkin.
For a maple twist, replace 2 tablespoons of the granulated sugar in the filling with pure maple syrup. Do not add extra liquid beyond that, or the filling may take longer to set.
For a chocolate drizzle version, let the bars chill completely, then drizzle melted dark chocolate lightly over the top before slicing. Keep the drizzle thin so pumpkin stays in front.
Make Ahead and Storage
These bars are made for planning ahead. Bake them up to 2 days before serving and keep them covered in the refrigerator. For the best texture, slice them cold, shortly before serving, rather than slicing days in advance.
Store leftovers in an airtight container in the refrigerator for up to 5 days, with parchment between layers if stacked. For longer storage, freeze individual squares on a tray until firm, then wrap tightly and freeze for up to 2 months. Thaw overnight in the refrigerator. Do not leave bars at room temperature for more than 2 hours.
Frequently Asked Questions
Can I use fresh pumpkin instead of canned?
Yes, if cooked until very soft, pureed smooth, and drained of excess water. Canned puree is more consistent and is what this recipe was tested with. If fresh puree looks watery, drain it in a fine-mesh strainer for 20 minutes before measuring.
Why did my bars crack on top?
The most common causes are overbaking and overbeating after the eggs are added. Bake just until the edges are set and the center jiggles slightly, mix on low speed once the eggs go in, and cool the bars gradually at room temperature before chilling. A small crack affects looks only, not flavor.
Can I double this recipe?
Yes. Bake a doubled batch in a 9 by 13-inch pan, adding about 8 to 12 minutes to the baking time. Look for set edges and a slight jiggle in the center, chill fully, and expect about 24 bars.
Do I need a water bath?
No. A water bath helps tall, whole cheesecakes bake gently, but these shallow bars bake evenly in a regular pan. Just keep the oven at 325°F and do not overbake.
Can I make these bars gluten-free?
Yes. Use certified gluten-free graham-style crumbs and replace the flour with an equal amount of gluten-free flour blend. The filling itself is naturally gluten-free.