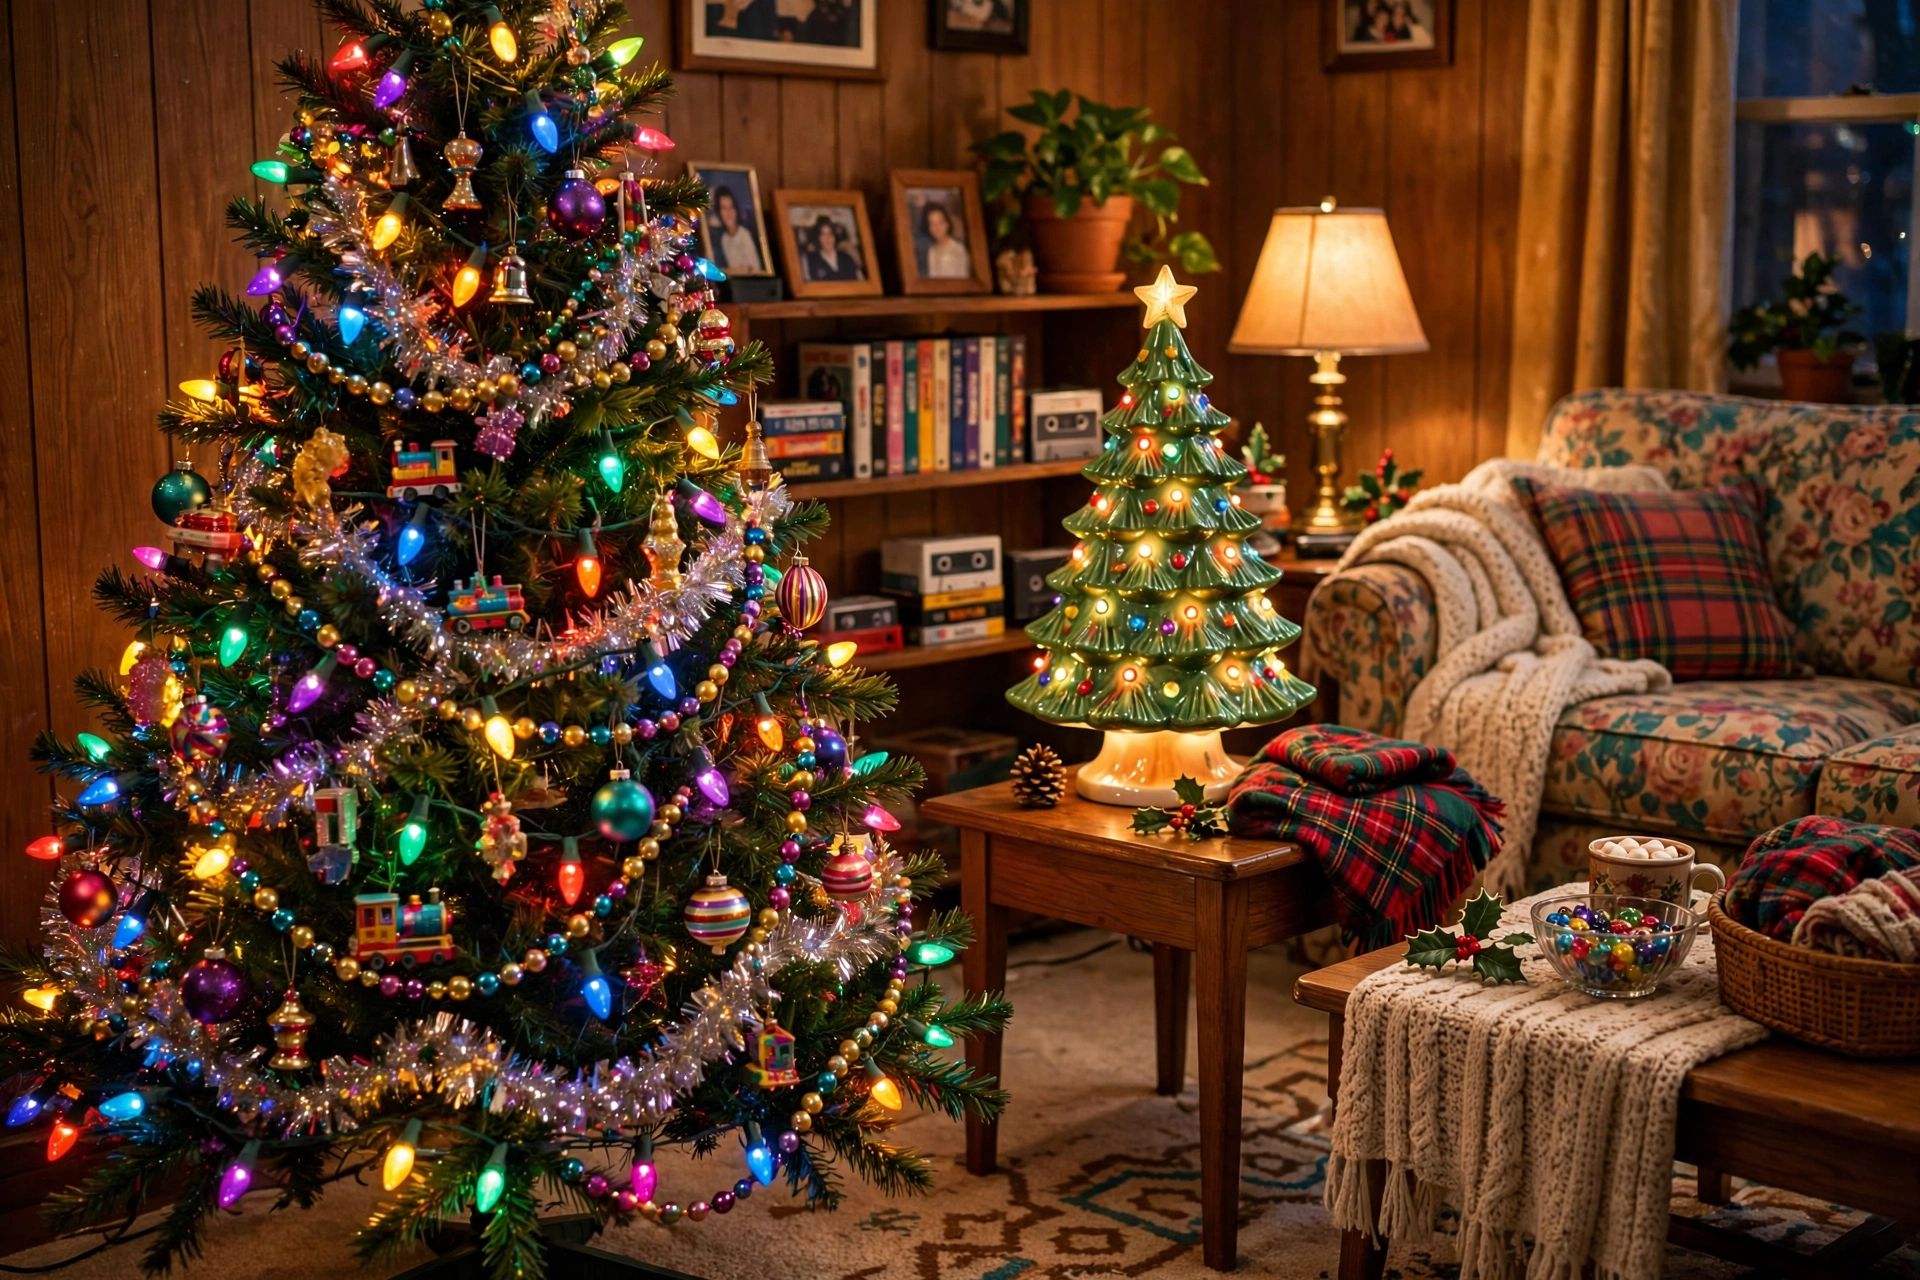
If you grew up in the nineties, you can probably close your eyes and see it: a tree dripping with tinsel, big colorful lights glowing red, blue, green, and yellow, a ceramic Christmas tree shining on the side table, and ornaments that did not match at all. After years of quiet, minimal trees, people are ready for a holiday that feels joyful and a little bit loud.
90s nostalgia Christmas decor is not about buying matching ornaments. It is about collecting, layering, and letting the tree tell a story. This guide shows you how to bring that look home — the tree, the mantel, and the small touches that make it feel like Christmas morning in 1995.
What Made the 90s Christmas Look
The nineties Christmas was maximalist in the best way: full trees, branches groaning under shiny baubles, character ornaments, and tinsel. The palette was bold — deep reds, forest greens, and gold — and multicolor C7 and C9 bulbs were the standard.
Tinsel was the signature texture, catching the light and giving the tree a shimmer no ribbon can copy. Beaded garland added sparkle and weight. And then the icons: the ceramic Christmas tree, the light-up village, the ceramic Santas, and the paper chains the kids made at school.
Materials You Will Need
- A tree, real or artificial, in a size that fits your room
- Multicolor C7 or C9 string lights, enough to wrap the tree generously
- Tinsel, silver or gold, in strands or icicle form
- Beaded garland in red, gold, or multicolor
- Shiny glass baubles in red, green, and gold, plus character ornaments and vintage pieces
- A ceramic Christmas tree with colored bulb tips
- Colored construction paper, scissors, and tape for paper chains
- A tree topper: a classic star, an angel, or a big red bow
- A tree skirt, plaid or solid red
- Optional: a Christmas village set, ceramic Santas, candy canes, and popcorn or cranberry garland
Step-by-Step: Building Your 90s Christmas Tree
1. Set up the tree and fluff the branches
Set the tree in its stand and check that it stands straight and steady. Fluff every branch from the bottom up, pulling the tips outward so the tree looks full, not flat. A well-fluffed tree holds ornaments better and shows off the lights. If you are using a real tree, give it water right away and keep the stand filled through the season.
2. Add the multicolor lights first
Wrap the multicolor lights around the tree before anything else, working from the inside of the branches outward and from the bottom up. Mix the colors evenly so no one side of the tree is all red and the other all blue. Step back and check the glow from across the room — the lights are the heart of the 90s look, so be generous with them.
3. Drape the beaded garland
Drape the beaded garland in loose, swooping swags around the tree, not in tight spirals. Start at the top and work down, letting each swag dip gently between the branches. Beaded garland adds sparkle and structure, and it gives the eye a path to follow around the tree. Tuck the ends into the branches so they do not dangle.
4. Hang the ornaments, biggest first
Hang the largest ornaments first, spacing them evenly around the tree and pushing some deeper into the branches for depth. Then fill in with medium and small baubles, clustering two or three near a large one. This is where the nineties shine: mix shiny glass baubles with character ornaments, vintage pieces, and handmade ones. Mismatched is the point — a collected tree looks loved, not decorated by a catalog.
5. Add the tinsel last
Work the tinsel in after the ornaments, not before, so you can use it to fill the remaining gaps and build texture gradually. Drape strands loosely over the branch tips, letting them hang naturally. Keep the tinsel to a single tone — mixing gold and silver on one tree is what tips the look from nostalgic to messy. If you are using tinsel icicles, scatter them lightly rather than piling them on.
6. Finish with the topper and the skirt
Add the topper last, once you can see the full tree shape: a classic star, an angel, or a big red bow all work. Keep it in proportion to the tree. Lay the tree skirt around the base, smoothing it out so it covers the stand and gives the tree a finished look. Step back, walk around the tree, and fill any bare spots with a few extra ornaments.
7. Bring the 90s to the rest of the room
Set the ceramic Christmas tree on a side table or the mantel and switch it on — its colored bulb tips are pure nineties magic. Hang the paper chains you made with the kids across the mantel or a doorway. Add the ceramic Santas and the Christmas village to the mantel, tuck candy canes into stockings, and let the multicolor glow spill out from the tree into the whole room.
Making Paper Chains Together
Paper chains are the most 90s craft there is. Cut colored construction paper into strips about an inch wide and six inches long, loop the first into a circle and tape it closed, then thread the next strip through it, building the chain link by link. Alternate red, green, gold, and white.
Thrift It First
The 90s look rewards thrift shopping more than almost any other style: ceramic trees, vintage glass ornaments, beaded garland, and old tinsel turn up constantly at thrift stores, estate sales, and marketplace listings. Check your own attic first — many families still have a box of nineties ornaments waiting to be rediscovered.
Keeping It Joyful, Not Chaotic
Let the tree be full and the rest of the room calm. If the tree feels busy, remove five ornaments and step back. Keep the palette to reds, greens, and golds, with the multicolor lights as the main bright color.
Safety Notes
Use only lights rated for indoor use, check every cord for damage, and switch the tree lights off when you leave the house or go to bed. Keep the tree away from fireplaces, candles, and heaters, and keep a real tree watered. Hang fragile glass ornaments high up, and keep shatterproof pieces at the bottom for small children or pets. Paper chains and tinsel are not toys.
Frequently Asked Questions
What are the key pieces of 90s Christmas decor?
The essentials are multicolor C7 or C9 lights, tinsel, beaded garland, shiny glass baubles in red, green, and gold, and a ceramic Christmas tree with colored bulb tips. Character ornaments, paper chains, a Christmas village on the mantel, and ceramic Santas complete the look. You do not need all of them — the lights and the tinsel alone will carry the feeling.
Can I mix 90s decor with a modern home?
Yes, and it works best when you let one area go full retro — usually the tree — and keep the rest of the room simple. A 90s tree in a modern living room looks intentional and joyful, not out of place. Keep the mantel and the table calm, and let the tree be the star.
Where can I find vintage 90s Christmas decorations?
Thrift stores, estate sales, and online marketplaces are the best sources for ceramic trees, vintage glass ornaments, and old beaded garland. Check your own attic and ask family members first — many nineties ornaments are still sitting in boxes. After-Christmas clearance sales are also a good time to stock up for next year.
Is tinsel safe to use with kids and pets?
Tinsel looks beautiful, but it is not a toy. Keep tinsel strands out of reach of toddlers and pets, who may chew or swallow them, and choose beaded garland or ribbon for the lowest branches if you have little ones. Icicle tinsel is best kept on the upper half of the tree, where small hands and paws cannot reach it.
How do I keep a 90s tree from looking messy?
Work in order: lights first, then garland, then large ornaments, then small ones, then tinsel last to fill the gaps. Keep the tinsel to one tone, keep the palette to reds, greens, and golds, and step back often to check the whole tree. If it feels busy, take five ornaments off — it will look better instantly.
Bring back the tinsel, plug in the multicolor lights, switch on the ceramic tree, and let the holidays feel like they used to.