
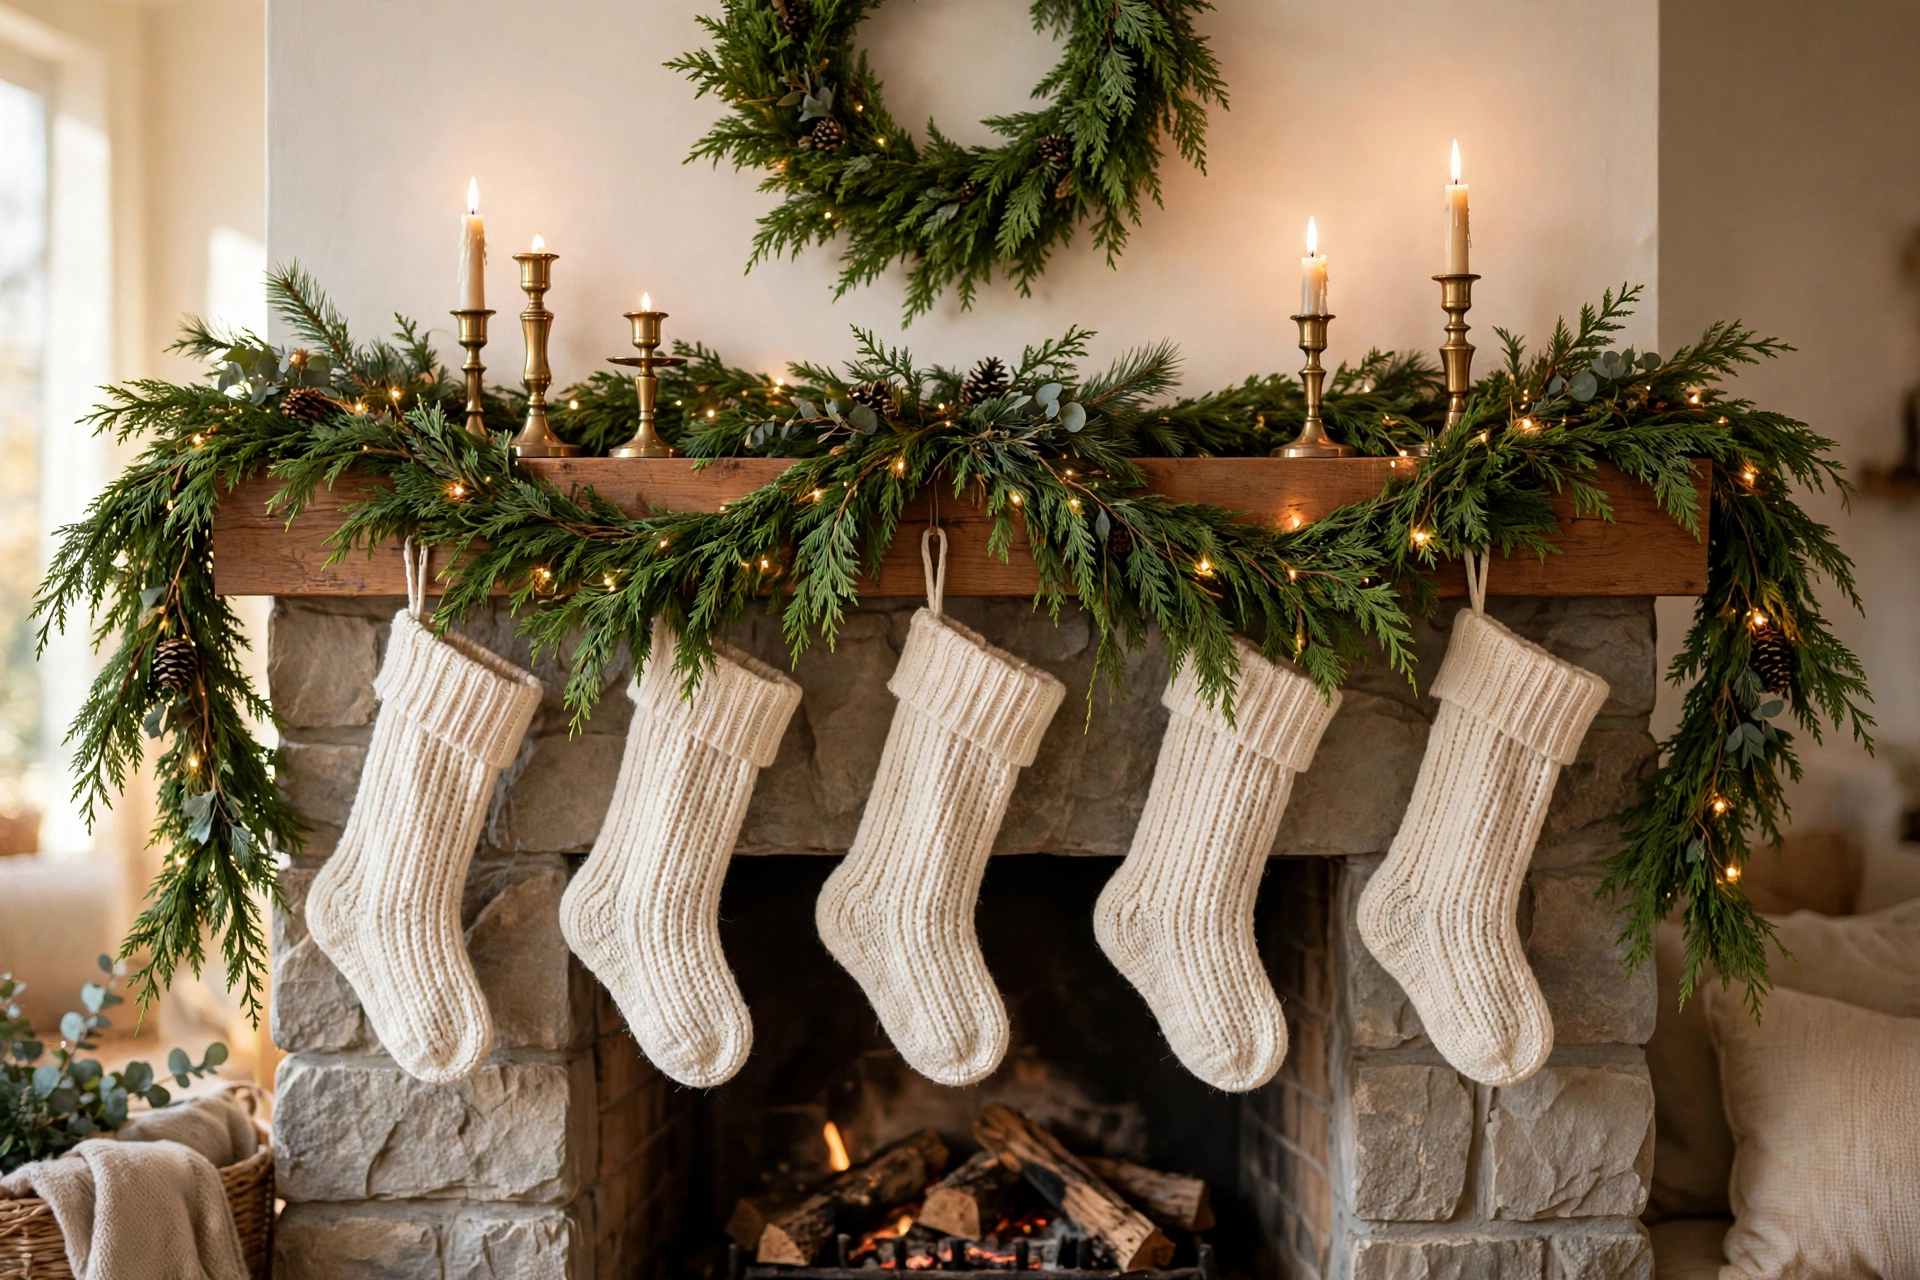
The mantel is the heart of a Christmas living room — the first thing guests notice, the backdrop for family photos, and the place where stockings wait all December long. A well-dressed mantel does not need to be expensive or complicated. It needs layers, a little warmth, and one clear focal point that pulls the whole look together.
This guide walks you through four simple projects that work together as one finished mantel: a layered cedar garland base, a row of stockings held safely without a single nail, clusters of brass candlesticks at varied heights, and a soft wash of warm-white fairy lights with one focal piece to anchor it all.
What Makes a Christmas Mantel Feel Finished
A mantel looks finished when it has three things: a base layer that covers the shelf, a middle layer that adds height and rhythm, and a focal point that gives the eye somewhere to rest. The garland is your base. The stockings and candlesticks are your middle layer, adding shape and sparkle. The focal piece — a wreath, a mirror, or a framed piece of art — sits above it all and ties the composition together.
Color matters too. A classic Christmas mantel leans on deep green cedar, warm brass, soft cream, and a touch of red or burgundy, with the warm glow of fairy lights pulling everything into one cozy story. Keep the palette to three or four colors and repeat them across the projects, and the mantel will look intentional rather than crowded.
Materials You Will Need
- Fresh cedar garland, long enough to drape across the mantel with a little extra for swags
- A second, fuller faux garland for layering underneath
- Stockings, one for each person in the household
- Weighted stocking holders, one per stocking, rated for a filled stocking
- Brass candlesticks in three heights, with taper candles to fit
- Battery-operated LED taper candles as a no-flame option
- Warm-white fairy lights on thin copper wire, battery operated
- A wreath, a mirror, or framed seasonal art as the focal piece
- Floral wire and removable adhesive hooks
- Pinecones, dried orange slices, and berries
- A sturdy step stool and scissors
Project 1: A Layered Cedar Garland Base
1. Lay the fuller garland first
Start with the fuller garland and lay it across the mantel so it drapes slightly over the front edge. Let the ends fall a little at each side rather than cutting them flush with the shelf; a soft cascade at the corners makes the mantel look generous and finished.
2. Layer the fresh cedar on top
Lay the fresh cedar garland over the first one, slightly forward so its tips show. The two layers together give you the lush, full look that a single garland rarely achieves on its own. Fluff the branches outward until the garland looks full from every angle.
3. Weave in lights and fill the gaps
Weave the warm-white fairy lights through the garland, tucking the thin copper wire into the greenery so it disappears, and hide the battery pack behind the garland at one end. Then tuck pinecones, dried orange slices, and sprigs of berries into any thin spots, using floral wire to hold each one.
Project 2: A Stocking Row With Weighted Holders
1. Choose stockings that match the mantel
Pick stockings in colors that repeat your mantel palette — cream and red, deep green and gold, or soft neutrals with a knitted texture. Matching stockings look calm and classic, while a set in one color family with different patterns feels playful and handmade.
2. Place weighted holders on the shelf
Set a weighted stocking holder on the mantel shelf for each stocking, spacing them evenly across the garland. Weighted holders are the renter-friendly answer to hanging stockings: they grip the shelf with their own weight, so no nails, screws, or drilled holes are needed.
3. Hang the stockings and keep them light
Hang one stocking from each holder and let it fall in front of the garland, adjusting the spacing until the row looks relaxed and even. For the weeks before Christmas, keep the stockings lightly filled or empty so the holders are never overloaded, and save the real filling for Christmas Eve.
Project 3: Brass Candlestick Clusters at Varied Heights
1. Gather candlesticks in three heights
Brass candlesticks bring warmth and old-fashioned elegance to the mantel. Gather three or five in different heights — a tall pair, a medium one, and a short one — and group them at one end of the mantel, or split them into two clusters to frame the stockings in the middle.
2. Arrange the cluster with space to breathe
Place the tallest candlestick at the back of the cluster and the shorter ones in front, with a little space between each so the brass can catch the light. Step back and look at the silhouette: you want a gentle staircase of heights, not a flat row.
3. Add candles and choose the no-flame option
Slide a taper candle into each candlestick and check that it sits straight and snug, wrapping a small strip of tissue around the base if one wobbles. On busy evenings full of children and pets, battery-operated LED taper candles give you the same warm glow with none of the worry.
Project 4: Fairy Lights and One Focal Piece
1. Choose your focal piece
The focal piece sits above the mantel and gives the whole display its anchor. A simple evergreen wreath is the classic choice, a round mirror reflects the fairy lights and makes the room feel bigger, and a framed piece of seasonal art adds personality.
2. Hang the focal piece safely
Hang the wreath or mirror from a removable adhesive hook or a picture hook rated for its weight, centered above the mantel. Use a sturdy step stool to reach the spot, and never stand on a chair or a stack of books.
3. Add the final layer of light
If your focal piece is a wreath, weave a second short string of fairy lights through it so it glows against the wall; if it is a mirror, the garland lights will reflect in it on their own. Switch everything on in the evening and step back to the doorway.
Safety Notes
Keep real candles well away from the cedar garland, the stockings, and any dried decorations, and never leave a burning candle unattended — blow candles out whenever you leave the room or go to bed. Use a sturdy step stool for hanging anything above shoulder height, and keep the garland clear of the fireplace opening so no greenery hangs near heat or flame.
Frequently Asked Questions
How do I hang stockings on a mantel without nails?
Weighted stocking holders are the easiest renter-friendly option: they sit on the mantel shelf and grip it with their own weight, so no nails, screws, or drilled holes are needed. Space them evenly and keep the stockings lightly filled until Christmas Eve.
How much garland do I need for a mantel?
Measure the length of your mantel shelf, then add a little extra for the swags at each end — as a rough guide, a garland about a foot longer than the shelf gives you a soft cascade at both corners. Layering two garlands gives a much fuller look than one alone.
What is the best focal piece above a Christmas mantel?
A simple evergreen wreath is the classic choice, a round mirror reflects the fairy lights and makes the room feel larger, and a framed piece of seasonal art adds personality. Choose just one, and hang it a few inches above the garland.
Can I use real candles on a Christmas mantel?
Yes, but with care: keep real candles well away from the garland, stockings, and dried decorations, trim the wicks short, and never leave a burning candle unattended. On busy evenings, battery-operated LED taper candles give the same warm glow with none of the worry.
How do I make my mantel look full without buying a lot of new decor?
Layer what you already have: a fuller garland underneath a fresh one, pinecones and dried orange slices tucked into thin spots, candlesticks you own grouped at varied heights, and one focal piece you already love. Repeating a small palette of three or four colors makes the mantel look abundant and intentional.
A Christmas mantel dressed with cedar, brass, stockings, and soft light is the warmest welcome a home can offer all season long. Step back, switch the lights on, and enjoy it.